Showing posts with label growing tomatoes. Show all posts

Sunday, 26 October 2014

Top Tips for Winter Plant Protection

With a little preparation and some frost protection essentials there’s no reason your plants can’t thrive this winter.

Frost Protection Jacket to protect your plant from the elements
As shorter days & colder nights approach, take some time to prepare to protect your outdoor plants from the first frost. Try to move any smaller or potted plants to sheltered spots. A Frost Protection Jacket will also provide your plants with further protection.

Our specially designed plant frost jacket is made from extra thick material to protect against temperatures as low as -8°C, but still permeable enough by air, light and moisture to ensure healthy plant growth. The winter sun will warm the air inside the jacket, which will also retain any heat.

Protecting Larger Plants from Frost

For those of you growing fruit trees, palm trees or cordylines, Gardening Fleece, also known as a horticultural fleece, is a highly effective form of plant frost protection. Wrapping garden fleece around the crown and trunk is ideal for protecting it from the bitter winds and harsh cold whilst allowing the plant to absorb water and nutrients for healthy growth.
A Plant Fleece Blanket will save your plant from the frost

Without sufficient frost protection, the water inside your plants’ cells will freeze overnight, damaging the cell walls. When the sun rises in the morning, the suns warmth will quickly defrost the cells and risk rupturing the cell walls altogether. This can take its toll on your plants gradually, or the shock could rupture the cell walls instantly.

Top Frost Protection Tip!

Brick walls will help to shield your plants from the harsh winter winds and, more importantly, absorb heat during the day, releasing it overnight, providing further heating for any nearby plants; making this an ideal spot to relocate prized plants. For additional frost protection our Gardening Angels love this clever Wall mounted Greenhouse.

If possible, you should position your plants at a higher point in your garden as it will minimise damage from sinking cold air. Whilst hearty foliage will not need to be covered, should you experience any snowfall, try to keep as much snow as possible off the branches as the extra weight can cause damage over time.

Propagation During Winter

The Vitopod Propagator is an Award Winning Heated Electric PropagatorProvide seedlings with added protection from cold weather with a heated propagator, perfect for creating a frost free growing growing environment, encouraging your seedlings & young plants to flourish in a safe, temperature controlled miniature greenhouse.

If your using a Vitopod Heated Propagator, plan ahead and add add extra layers to this height adjustable propagator. Perfect for keeping mature, taller plants frost free over winter until outside temperatures begin to increase again and ideal for giving your plants extra room to grow!


If you would like to find out more about frost protection or propagation, feel free to give us a call on 0845 602 3774 or drop us an email at info@greenhousesensation.co.uk. Our Gardening Angels are always happy to help and we’d love to hear about how you get on this winter!

Tuesday, 21 October 2014

How to get the Best from an Electric Propagator

The award winning Vitopod Heated Propagator
An electric heated propagator provides the ideal growing environment to give your seeds and cuttings the best possible head start.

If you’re using a height adjustable propagator such as our Award Winning Vitopod Propagator, you can add extra layers to create your own mini greenhouse. Perfect for keeping taller plants frost free over winter and giving seeds and cuttings extra time and space to grow.

Read our Gardening Angels top tips on how to get the best out of your heated propagator.

Optimum Temperature Settings

Ensure the best possible growth by setting your heated propagator to the right temperature for what you are growing. The temperatures required for each plant can vary depending on what seeds you are propagating, so always check the seed packets for any suggested growing temperatures.

We would recommend setting the Vitopod’s thermostatic control for 20˚C, as this will generally provide the ideal temperature for the majority of propagated plants. This way, you can, for example, grow chillies and tomatoes at the same time, without the risk of either seed being cooked.
Set the thermostatic control on the Vitopod Heated Propagator between 5 and 30 degrees

When growing your own chilies, your seeds will benefit from temperatures between 25-30˚C for germination. Once germinated, set the temperature around 18-24˚C in the daytime and lower to 15-18˚C at night to ensure consistent growth.

Tomato growers will want to set their propagator for 22-30˚C when germinating, then adjust to 16-22˚C during the day and 14-16˚C overnight for optimum growth. Generally, most other vegetables will require temperatures around 15-20˚C.

Controlling Humidity in Your Propagator

Humidity can be a real problem in a heated propagator so watch out for a build-up of condensation which can cause young plants to rot and die off. If you see condensation running down the sides of your propagator, open the vents or remove the lid to allow excess heat to escape. If you do remove the lid, remember to replace it overnight!

Do I Need to Use Gravel or Sand?

With the Vitopod Heated Propagator, you do not need gravel or sand to evenly spread heat
If you’re using a Vitopod Heated Propagator to propagate your seeds and cuttings, heat is distributed evenly throughout the base of your propagator so there is no need to use sand or gravel.

Some propagators do not provide even heat across their base. This is essential when ensuring even growth in your propagator, so if you do not have a Vitopod, you may want to consider lining the base of your propagator with either gravel or sand. This will allow the heat to be spread evenly through your propagators base. If you don’t even out the heat you may find some of your seeds may germinate faster than others and your seed trays may dry out faster.

Do I Need to Use Capillary Matting?

Rather than watering from above, some gardeners prefer to place a wet capillary mat below their plants, allowing them to absorb the water from below. This can be done with the Vitopod propagator, however keep an eye out for any humidity issues and be careful not to over-water your plants.

Watering Seedlings

Use a soil moisture meter to monitor soil and avoid overwatering
Young seedlings will not require a great deal of water, but you still don’t want them to dry out. Monitor moisture levels using a moisture meter and ensure your seedlings receive the right level of watering. Ideally, you should aim to keep the soil moist but should not see any surface water.

Providing Light for Your Seedlings

If seedlings don’t get the light they need, they develop long and skinny stems that are unable to support the plant’s growth. This will lead to your plants being increasingly susceptible to disease and pests whilst failing to provide a great harvest. To increase your plant’s exposure to light, move your propagator to a sunny windowsill or greenhouse.

Keeping Your Propagator Clean

At the start and end of the sowing season ensure you have cleaned your Vitopod Electric Propagator, seed trays and pots before adding any new plants. By using a biodegradable soap, you can keep everything neat and tidy whilst helping to prevent the spread of any plant diseases.


There are many different ways you can utilise the Vitopod Electric Propagator, so if you have any questions about setting up the propagator or any tips from your experience, feel free to call us on 0845 602 3774 or email us at info@greenhousesensation.co.uk. Our Gardening Angels are always happy to help and love hearing your propagation success stories!

Thursday, 16 October 2014

Overwintering in a Heated Propagator

Protect your favourite plants from frosts this winter and overwinter healthy plants and cuttings in a heated propagator.

What is Overwintering?

The Vitopod Electric Propagator is height adjustable allowing more room for your plants to grow
Overwintering is the process of providing a safe environment for your plants, ensuring they survive over winter. A heated propagator, such as the Vitopod Heated Propagator, provides the heat and protection your plant needs to survive.

With large vents for humidity control, you can place the Vitopod Propagator inside your greenhouse, its clear sides and lid allowing your plants to take full benefit from the available light. By adding extra layers to the Vitopod, you can accommodate for taller plants.

Why Overwinter my Plants

Overwintering gives plants will get a head start when the daylight increases in February and start growing your favourite fruit and vegetables earlier.

You can expect an earlier harvest of bumper crops from any overwintered plants as the start leads to an extended growing season. Plus, by protecting your fragile plants from the elements, overwintering could be considered as additional plant frost protection.

What to Overwinter

Overwintering is perfect for tomato and chilli growers, so prepare your plants for the move to a heated propagator. For more information on overwintering chillies, read our guide by clicking here.
For cuttings propagation, our Gardening Angels have experienced increased success rates with the Hydropod Cuttings Propagator
Ornamental plants, such as fuchsias or geraniums, can also be overwintered. This is a great cost-cutting measure as you can keep your beautiful flowers going for replanting in the spring. This is an ideal way to protect your ornamental plants from frosts, ready for taking cuttings for the next season.

Our Gardening Angels like to use a Hydropod cuttings propagator for increased cuttings success rates. The Hydropod reduces the risk of damping-off, drying-out and fungal infections and helps to speed up growth.

When to Start Overwintering

You can typically start overwintering when night time temperatures drop significantly, which is normally around the end of October.

Prepare your Plants for Overwintering

Harvesting and Pruning the Trinidad Scorpion ahead of Propagation
If you are an allotment grower, you will notice the ground is starting to frost over. By using a frost protection fleece to cover any rooted plants, you can keep them protected until they move to the propagator.

Before moving your plants to the propagator, trim back branches to around 10cm and harvest as much as you can. Chillies and tomatoes can be ripened off plant if necessary. By removing branches, foliage and fruit, your plant will require less energy to keep going and will be more likely to survive the winter.

If you are overwintering any plants grown in planters, carefully dig them out and repot them. Try to remove any loose compost and repot with fresh compost. You could also consider trimming back the roots on your plants and moving to smaller pots as this allows the plant to reserve and focus its energy.

Caring for Overwintered Plants

Once your plants have been moved to the electric propagator, you can begin supporting them over winter. A good source of light is essential for a plant’s survival, so ensure your propagator is positioned appropriately; consider placing the propagator within your greenhouse.

As temperatures decrease, plants retain water for longer. Over watering will encourage damp and mould to develop around the plant. Check the plant every few days and only water if the surrounding compost is dry.

Maintain a constant temperature between 5°C and 12°C to keep plants alive and frost free. If the temperature surpasses 12°C, plants start to grow, which you won’t want to happen until spring. With the Vitopod Propagator, we recommend opening the vents fully over winter to allow airflow around your plants, helping to prevent bacterial and viral disease build up.

When to Replant your Plants

The Quadgrow will make an excellent home for you overwintered plants
When the temperature begins to surpass 12°C consistently, typically around March or April, turn up the temperature in your Vitopod to encourage growth. When outdoor temperatures rise, your plants will be ready to move from the safety of your heated propagator and into their new planters. When you do move to new planters, it is very important your plants are not hit by the frost, so consider using some Frost Fleece to protect your plant in the early stages.

Who to Talk to About Winter Propagation

If you would like to know more about propagating over the winter months or what you can grow with your propagator, feel free to call us on 0845 602 3774 or email us at info@greenhousesensation.co.uk. Our Gardening Angels are always happy to help and love hearing your propagation success stories!

If you want to learn more about ripening tomatoes off plant, click here for our handy guide!

Friday, 29 August 2014

Love Green Tomatoes - Home Made Chutney


Love your green tomatoes and make fab chutney! Shorter days and colder nights mean that you might be left with unripe tomatoes – but don’t let them go to waste, have a go at this delicious chutney recipe.

Check out our tomato growing essentials for more inspiration.
http://www.greenhousesensation.co.uk/tomato-and-chilli-growing-essentials/tomato-growing-essentials/

Ingredients 
  • 1kg green tomatoes chopped
  • 450g onions finely chopped
  • 450g apples or pears peeled, cored and chopped
  • ½ tsp salt
  • 450g white sugar
  • 450g sultanas
  • ¼ tsp fresh ground pepper
  • 2 rounded tsp mustard seed
  • ½ tsp ground ginger               
  • 550ml white wine vinegar or cider vinegar
Method
  1. Soften the onions in a pan with enough vinegar to cover them. You may need to top up the vinegar to prevent the onions from burning.
  2. Once the onions are soft add the rest of the ingredients, stir in the sugar and bring to the boil.
  3. Steadily boil the mixture until the chutney thickens and pour into jars ready to seal and store.

Friday, 4 July 2014

Growing in Water - Hydroponics Uses & Origins

Hydroponically grown Tomatoes
Competitive & adventurous gardeners love growing in water with our Vivigrow and Rain & Drain Planters which use the hydroponic technique where plants are grown in water. There are some fascinating origins and uses behind the technique of growing in water so we thought we’d share a few with you...

Floating gardens of the ancient Aztecs

The Aztecs were a nomadic tribe who were driven onto the marshy shore of Lake Tenochtitlan, located in what is now Mexico. They had no land on which to grow crops, so they learned how to build rafts of rushes and reeds and grow vegetables, flowers, and even trees on these rafts which they called Chinampas.

They dredged up soil from the bottom of the lake and piled it on the rafts. The soil was rich of organic debris that released large amounts of nutrients which fed the abundant crops of vegetables, flowers, and even trees planted on them. The roots of these plants grew though the floor of the raft and down into the water. This is much like the root growth you will see in our Vivigrow Planter. Watch our short video showing early root growth of our tomatoes growing in our Vivigrow.

Sometimes the rafts were joined together to form floating islands as long as two hundred feet long. Some Chinampas even had a hut for a resident gardener.

The Aztecs eventually developed a large and powerful empire but they continued to maintain the rafts. In the 16th Century when the Spanish arrived in the New World in search of gold, they were fascinated by these islands of trees seemingly suspended on the water. Chinampas continued to be used in the area into the nineteenth century.

Hanging gardens of Babylon

Many garden writers believe that the hanging gardens of Babylon, one of the seven wonders of the ancient world, were grown using a sophisticated hydroponic system into which oxygen and nutrient rich fresh water was regularly pumped.

Egypt & Antartica

Ancient Egyptian hieroglyphic records dating back to several hundred years B.C. describe the growing of plants in water along the Nile without soil. The extreme environmental conditions found in the Arctic make the process of growing food a formidable challenge. Four months of solid daylight, four months of total darkness, and unpredictable winds and temperature changes make growing extremely difficult. However, in Antarctica, successful harvests are achieved on a daily basis.

Astrastronauts & Military

NASA have been trialing systems growing in water and now astronauts are likely to be fed on long flights using food originating from crops grown in water. In World War 2 the shipping of fresh vegetables to overseas outposts was not practical so both the American Army and the Royal Air Force opened hydroponic units at military bases. Many millions of tons of vegetables grown without soil were eaten by Allied Soldiers and Airmen during the war years. After World War II the military command continued to use hydroponic growing methods. The United States Army had a special hydroponics branch and in 1952 it grew over 8,000,000 lbs. of fresh produce in water.

Our Vivigrow & Rain & Drain Planters

The Vivigrow is a ‘hydroponic’ growing technique and our very own founder of Greenhouse Sensation was one of the pioneers of hydroponics. He developed the Vivigrow so that this technique of growing in water in a soil-less planter could be adapted for home/greenhouse use on a smaller scale. The beauty of the Vivigrow planter is that the planter pumps a constant stream of water & nutrients over your plants’ roots, which encourages your plants to take up more water, nutrients and oxygen compared to if you were growing in soil. Watch our founder harvesting a mass of chillies grown in our 3 Plant Vivigrow Planter at the end of the growing season.

Our Rain & Drain Tropical Planter has been designed by our horticulturists to replicate the watering & feeding conditions needed by tropical plants. The Rain & Drain Planters inclusive water timer ensures your tropical and exotic plants such as bananas, ginger and papaya are fed & watered several times a day without ever over-watering. Pebbles are used in the planter instead of soil and a small pump waters the plants several times per day ensuring the plants have access to everything they need for stronger healthier plants and bumper harvests. Watch our founder breaking ginger harvest record.

Friday, 13 June 2014

How Our Vivigrow Planter Works


Plants Root - Before transplanting into vivigrow planter

Grow in water with our Vivigrow Hydroponic planter and acheive 3-4x bigger harvests of your favourite tomato, chilli and other vegetables compared to soil grown plants. We like to raise you plants in rockwool cubes from seed or cutting before transplanting in to our Vivigrow, but if you prefer to buy plants, you can dust the compost off and pop them into the Vivigrow. Before transplanting, make sure your plants have abundant white roots on the outside of your soil or rockwool cube.

Watch our video below to learn how the Vivigrow Planter works

Vivigrow Planter FAQ


Q. Can I grow plants from seed in the ViviGrow? 
A. It is not recommended to do this. The Vivigrow is designed for growing plants from planting out stage to maturity.

Q. What plants can I grow in my ViviGrow?
A. Any plant. Although best results are achieved with fast growing crop plants, such as tomatoes, chillies and cucumbers.

Q. Where can I use ViviGrow?
A. A greenhouse, polytunnel or conservatory is ideal but anywhere with plenty of light, air and heat (but not too hot) is fine.

Q. Can I mix plant species in my ViviGrow?
A. Yes. More vigorous plants should be placed higher in the planter, for example tomatoes should be nearer the delivery tube and peppers nearer the water outlet of the growing tray.

Q. What should I do with water and nutrients emptied from the reservoir?
A. Use it on pot plants, borders, hanging baskets or the vegetable patch.

Q. How can I tell if my water supply is ‘hard’?
A. You don’t get much lather with hardwater and it furs up the kettle. If you are in any doubt use ‘universal’ greenhouse sensation™ nutrients.

Q. My water supply is really hard. Is it ok for the ViviGrow?
A. Yes it’s fine but we would recommend using hardwater nutrients.

Q. How much topping-up is normal?
A. It depends on how well your plants are growing. The more topping-up they need the better the growth. Our record is approx 12 litres per day for two ‘Hero’ chilli plants in a 3-plant ViviGrow.

Q. My plants have water droplets on the leaf each morning. Is it ok?
A. Yes it is sign of good health.

Q. How long can I expect the nutrient pack to last?
A. The more nutrient solution the plant uses the healthier it is. You can expect nutrient packs for the ViviGrow to last a season.

Hydroponically Grown Sweet Peppers


Read our fun guide on some extra facts on the origins of growing in water and take a look at our other grow in water planters below:

Growing in Water - Hydroponics Uses & Origins
Growing in Water - Hydroponic Planters
Videos & Posts on Growing in Vegetables in Water
Vivigrow Planter Instructions

Tuesday, 6 May 2014

Watering Plants: Slow-drip irrigation Vs hand watering


Watering Plants: Slow-drip irrigation Vs hand watering


Watering plants in growbags, raised beds and allotments is less time consuming, more water efficient and more beneficial to your plants with our Click & Drip irrigation kit.

It can be difficult to keep up with a watering regime, and when pushed for time it' s tempting to give plants a soaking in the morning to ' keep them going' throughout the day, but roots need access to air in order to take-up water, so over-watering has 3 problems:

1: Suffocation - In a grow bag a drenching fills the air-gaps in the soil with water and the roots can suffocate and rot.

2: Slow-take up - Immediately after watering the roots have limited access to air so they are only able to take up a small amount of the water they actually need.

3: Drain-off - By the time the roots have good access to air the majority of water has drained away.

Plants only take up 10%-30% of the water given when watering by hand, the answer is slow drip irrigation. The slow drip rate of the Click & Drip watering kit means that the soil has chance to absorb the water rather than it forming puddles and evaporating or running off.

 Click and Drip complete plant watering kit


Click & Drip Slow-drip irrigation Vs hand watering


1. Slow drip watering over longer periods gives plants plenty of time to take up water, as and when they need to. Plants have access to a balance of oxygen and water to ensure healthy growth and bigger harvests.

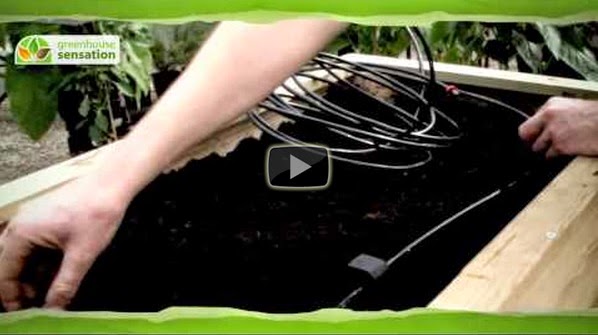
2. Drip feed irrigation pipe works on internal pressure so the pipe can be buried to reduce loss of water to evaporation, and the water can get through to the roots quickly. Mulch is laid on top of the soil and pipe to help retain moisture for effective watering.

3. Blockages from limescale in the irrigation pipe are prevented thanks to the Click & Drip watering kit's filter.

4. Dripper holes are spaced 30cms apart and the Click & Drip kit includes 5 metres of non-drip pipe to carry water from the tap to the plants without wasting a drop. The distance between the drip holes is perfect for watering raised beds, veg plots and plants in growbags.

5. Dripper pipe watering moistens only the soil and not the leaves, so risk of fungal problems and rot is significantly reduced.

6. Click & Drip irrigation kit can be used during hose-pipe bans as it is extremely efficient!

7. For a fully automatic watering system, a timer can be added to control the precise drip rate for plants.

Over and under watering are the main causes of root rot and split fruit, which are eliminated with slow-drip watering.

Top Tip: Always water early in the morning or late in the afternoon rather than during the middle of the day. When the weather is hot, water runs off the soil or evaporates before it gets to the roots, so plants have access to far less water than they are given.

If you have any questions about our Click & Drip irrigation kit or any of the plants you are growing, please give our Gardening Angels a call on 0845 602 3774 or send over an email info@greenhousesensation.co.uk.