Showing posts with label plant growing. Show all posts

Wednesday, 22 October 2014

Hardening Off in a Propagator

The Vitopod Heated Propagator is ideal for overwinteringOnce your plants have made it through winter, the time will come when they must leave the safety of their heated propagators and moved to their final growing place .

Before moving plants out of your heated propagator, you will need to harden them off. “Hardening off” is the process of acclimatising your plants to live outside of a heated environment, encouraging them to develop stronger, waxier leaves that can cope with natural conditions outside the propagator. This must be carried out gradually to avoid your plants going into shock.

You can start hardening off your plants when night time temperatures reach 5°C; although the higher the temperature, the easier the process will be. If hardening off at 5°C, you still need to implement some additional protection such as a frost protection fleece. A frost protection gardening fleece will keep the plant safe from any sudden drops in temperature and will allow you to plant outside sooner.
A seedlings true leaves just coming through

The decision for when to harden off plants should be based on the time of sowing/planting rather than the development stage of your plant. Young plants are less likely to tolerate sudden changes in temperature, so these should be left a little longer. Typically, when your plant has developed its true leaves it will be ready for hardening off.

Plants grown in warmer environments, such as an Electric Heated Propagator, will need to be hardened off more gradually, as these are used to higher temperatures.

The duration of the hardening off process can vary depending on what you are growing. However this is the typical process for hardening off in an electric heated propagator:

Stage 1: Leave the lid off your propagator during the day
Recommended Duration: 7 days

Stage 2: Leave the lid off your propagator all the time
Recommended Duration: 7 days

Stage 3: Remove plants from the propagator (ideally move to greenhouse or mini greenhouse, or outside with plant frost protection)
Recommended Duration: 7 days

Stage 4: Transplant your plants in their final planter

A Quadgrow planter makes a great final home for your seedlings
In addition to these steps, it is important to consider the other changes that your plant will have to adapt to and how you can prepare them for this.

- Your plants will be experiencing greater levels of direct sunlight, so try to move your plant to a sunnier spot gradually throughout this process to lessen the shock.

- Aim to plant out on an overcast day as this will minimise the risk of your plants wilting.

- If planting outdoors, protect young plants from slugs with some organic slug pellets and keep hungry pests away.

Now your plants will be ready to grow and your Vitopod Propagator will be free for sowing your springtime seedlings!

If you have any questions about hardening off, or if you’d like to share any advice from your previous experience, feel free to call us on 0845 602 3774 or email us at info@greenhousesensation.co.uk. Our Gardening Angels are always happy to help!

Friday, 13 June 2014

How Our Vivigrow Planter Works


Plants Root - Before transplanting into vivigrow planter

Grow in water with our Vivigrow Hydroponic planter and acheive 3-4x bigger harvests of your favourite tomato, chilli and other vegetables compared to soil grown plants. We like to raise you plants in rockwool cubes from seed or cutting before transplanting in to our Vivigrow, but if you prefer to buy plants, you can dust the compost off and pop them into the Vivigrow. Before transplanting, make sure your plants have abundant white roots on the outside of your soil or rockwool cube.

Watch our video below to learn how the Vivigrow Planter works

Vivigrow Planter FAQ


Q. Can I grow plants from seed in the ViviGrow? 
A. It is not recommended to do this. The Vivigrow is designed for growing plants from planting out stage to maturity.

Q. What plants can I grow in my ViviGrow?
A. Any plant. Although best results are achieved with fast growing crop plants, such as tomatoes, chillies and cucumbers.

Q. Where can I use ViviGrow?
A. A greenhouse, polytunnel or conservatory is ideal but anywhere with plenty of light, air and heat (but not too hot) is fine.

Q. Can I mix plant species in my ViviGrow?
A. Yes. More vigorous plants should be placed higher in the planter, for example tomatoes should be nearer the delivery tube and peppers nearer the water outlet of the growing tray.

Q. What should I do with water and nutrients emptied from the reservoir?
A. Use it on pot plants, borders, hanging baskets or the vegetable patch.

Q. How can I tell if my water supply is ‘hard’?
A. You don’t get much lather with hardwater and it furs up the kettle. If you are in any doubt use ‘universal’ greenhouse sensation™ nutrients.

Q. My water supply is really hard. Is it ok for the ViviGrow?
A. Yes it’s fine but we would recommend using hardwater nutrients.

Q. How much topping-up is normal?
A. It depends on how well your plants are growing. The more topping-up they need the better the growth. Our record is approx 12 litres per day for two ‘Hero’ chilli plants in a 3-plant ViviGrow.

Q. My plants have water droplets on the leaf each morning. Is it ok?
A. Yes it is sign of good health.

Q. How long can I expect the nutrient pack to last?
A. The more nutrient solution the plant uses the healthier it is. You can expect nutrient packs for the ViviGrow to last a season.

Hydroponically Grown Sweet Peppers


Read our fun guide on some extra facts on the origins of growing in water and take a look at our other grow in water planters below:

Growing in Water - Hydroponics Uses & Origins
Growing in Water - Hydroponic Planters
Videos & Posts on Growing in Vegetables in Water
Vivigrow Planter Instructions

Tuesday, 6 May 2014

Watering Plants: Slow-drip irrigation Vs hand watering


Watering Plants: Slow-drip irrigation Vs hand watering


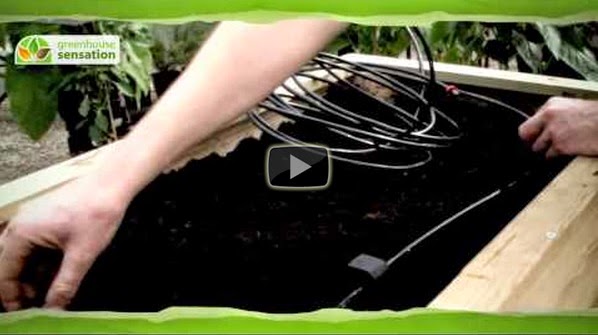
Watering plants in growbags, raised beds and allotments is less time consuming, more water efficient and more beneficial to your plants with our Click & Drip irrigation kit.

It can be difficult to keep up with a watering regime, and when pushed for time it' s tempting to give plants a soaking in the morning to ' keep them going' throughout the day, but roots need access to air in order to take-up water, so over-watering has 3 problems:

1: Suffocation - In a grow bag a drenching fills the air-gaps in the soil with water and the roots can suffocate and rot.

2: Slow-take up - Immediately after watering the roots have limited access to air so they are only able to take up a small amount of the water they actually need.

3: Drain-off - By the time the roots have good access to air the majority of water has drained away.

Plants only take up 10%-30% of the water given when watering by hand, the answer is slow drip irrigation. The slow drip rate of the Click & Drip watering kit means that the soil has chance to absorb the water rather than it forming puddles and evaporating or running off.

 Click and Drip complete plant watering kit


Click & Drip Slow-drip irrigation Vs hand watering


1. Slow drip watering over longer periods gives plants plenty of time to take up water, as and when they need to. Plants have access to a balance of oxygen and water to ensure healthy growth and bigger harvests.

2. Drip feed irrigation pipe works on internal pressure so the pipe can be buried to reduce loss of water to evaporation, and the water can get through to the roots quickly. Mulch is laid on top of the soil and pipe to help retain moisture for effective watering.

3. Blockages from limescale in the irrigation pipe are prevented thanks to the Click & Drip watering kit's filter.

4. Dripper holes are spaced 30cms apart and the Click & Drip kit includes 5 metres of non-drip pipe to carry water from the tap to the plants without wasting a drop. The distance between the drip holes is perfect for watering raised beds, veg plots and plants in growbags.

5. Dripper pipe watering moistens only the soil and not the leaves, so risk of fungal problems and rot is significantly reduced.

6. Click & Drip irrigation kit can be used during hose-pipe bans as it is extremely efficient!

7. For a fully automatic watering system, a timer can be added to control the precise drip rate for plants.

Over and under watering are the main causes of root rot and split fruit, which are eliminated with slow-drip watering.

Top Tip: Always water early in the morning or late in the afternoon rather than during the middle of the day. When the weather is hot, water runs off the soil or evaporates before it gets to the roots, so plants have access to far less water than they are given.

If you have any questions about our Click & Drip irrigation kit or any of the plants you are growing, please give our Gardening Angels a call on 0845 602 3774 or send over an email info@greenhousesensation.co.uk.